Last post for the day! Already set to a late lunch lol. Anyway, as I mentioned in a much earlier post, I'm taking two classes this term - Digital Sets and Environment Creation for Games. For my environment creation for games class, I will be creating a sci fi game environment. More specifically, it'll be the engine room of a space ship. For the first assignment, we just had to gather references and get out plan out. For the second week, we had to start working on conceptualizing our culture set, or prop set, for our scene. From that, we will begin modeling stuff out, UVing, texturing, etc etc.
Not all the props will make it into the scene, unless I'm really lucky and work like a maniac. But with only two classes this term, I should be able to. If I don't, it's because I want to focus on quality vs quantity. I want the important focal elements to be solid in terms of quality of the model and the textures. The must-haves for my scene include the engine core, the large (long) terminal, and the ground light and bomb props.
My secondary focuses will be on the arch support, wall support, the small/large crates, the walkway, the stairs and the railing.
My final focus, time permitting, will be to create the sci fi wall panels, ceiling panels, ceiling supports and anything else that might be missing from making it more of a complete scene.
Thursday, May 3, 2012
Return of the Dump Truck
I decided to return back to the Caterpillar 793D dump truck which I modeled out as my midterm project back in Hard Surface Modeling 2. I wanted to give this baby a texturing over. Right now, the textures and lights are only in the starting phase. I have a simple 3-point lighting setup using Vray and have some basic textures and grunge and paint peels. Because the model was built to scale, it's freakin huge. I had to divide up the model into 4 sections, each section having their UVs packed into the 0-1 space and receiving their own unique color, bump, spec, and gloss maps. Although right now, I think the front section should be divided up more. I packed everything into the 0-1, but the texture quality is not as good as it should be. Might have to split that up.
Everything is still kinda flat and boring. Like I said, first pass at it. Still have much more to do and to fix and adjust, even the lighting setup is probably bound to change. Will see in time where I take this as I work on this some more.
Everything is still kinda flat and boring. Like I said, first pass at it. Still have much more to do and to fix and adjust, even the lighting setup is probably bound to change. Will see in time where I take this as I work on this some more.
Room - Textured and Lit
All righty and here is a simple room! Boring huh? This term, I intend to make something less boring lol. But anyway, this scene was taken from an anime - Aria the Animation, and I first built it in my Intro to Unreal class. So everything was built low poly and throw into Unreal for the sake of learning the engine. For hard surface texturing and shading and for lighting and rendering 2, I converted everything back to high poly and worked on it as much as possible.
So this scene was lit using Vray sun and several vray rectangular lights shining in through the windows and set to portal lights. My camera was converted to a physical cam and everything else was just normally textured, some procedural, others through Photoshop.
Experimenting with Caustics
Caustics and photons. Never really touched or knew much about these until we had a class that went over it. But omg did I love working with it. I'm so glad to have had this lecture. Learning about how to fiddle with caustics and photons really can add a huge kick to a render. Now my glass in the shots aren't great, but I didn't care too much about it as much as I did the caustics. So nice.
Diffusive Materials and Compositing
Following the week of metals, we had a lecture on diffusive materials. That week, it was simply to render out the same render passes and composite them together again.
Metals and Compositing
In the 2nd week we got a look into doing render passes with render layers in Maya and had a quick review of the traits of metal. The homework assignment was to have a couple layers, a base metal texture and a paint texture overlayed on top, and render out passes for specular, reflection, raw diffuse, color etc. Then we had to bring them into Photoshop and composite them together. The six below are the result of what I did for the assignment.
Material Contact Sheet
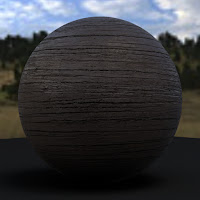
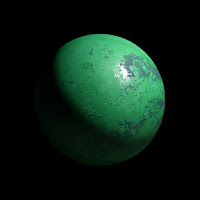
One of the first assignments from my other class - hard surface texturing and shading - was to create a contact sheet of materials. It was to be practice so that, in production, if an art director asks for a material, you can make several kinds and have him pick one that he favors most, then go back and focus on that one. Instead of making one at a time and getting shot down one after another.
This was done before we had the class which taught how to make diffusive materials, hence why the wood and concrete materials are screwed up with a sharp highlight. Oops. But the metals came out all right.
This was done before we had the class which taught how to make diffusive materials, hence why the wood and concrete materials are screwed up with a sharp highlight. Oops. But the metals came out all right.
Da Mad Science!
This was the...I forget, 2nd or 3rd week homework assignment for Lighting and Rendering 2 with Vray. I think it was the 3rd week. But anyway, I loved this. The thing with scenes pre-modeled and imported is that there seems to always be something screwy. I had to be sure to go in and check the attributes of any models that looked weird off the bat, flip normals on several objects, fiddle with 2 sided lighting etc. But eventually, I felt that it came out looking pretty nice for a first pass at it. The book covers are, of course, flat colors. I didn't want to spend too much time making those photoreal, or have them look so nice that they stand out. I was more interested in fiddling with vraymtl to get the stainless steel, glass, and the fog in the liquid.
3-Point Lighting Study
Moving on! Another of my classes last term was Lighting and Rendering 2 utilizing Vray in Maya to produce some nifty lighting results. For the very first week, we had a review of the principle of 3-point lighting and had to light up a buddha model. I gave it a quick bronze color, some dust and wear on it (minimal wear), tossed in a spec map and there we have it. Oh, and duh, three vray rectangular lights for key, fill and rim. For a homework assignment where I was freshly going into Vray and mind boggled at the settings in the shaders and render settings, I felt it came out okay.
I actually prefer using vray over mental ray at the moment. Even going into this current term, for a project that I'll be posting later, I'm still using vray. I just became so comfortable with it from the class. Mental Ray is good too, I just feel more comfortable in Vray at the moment. Doesn't mean I'll stop using mental ray! The caustics in that is pretty sick looking!
I actually prefer using vray over mental ray at the moment. Even going into this current term, for a project that I'll be posting later, I'm still using vray. I just became so comfortable with it from the class. Mental Ray is good too, I just feel more comfortable in Vray at the moment. Doesn't mean I'll stop using mental ray! The caustics in that is pretty sick looking!
Environment Design Midterm
It's been a while since I last updated my blog with stuff. I found myself insanely busy last term, but I'm now going to post what I did in the previous term in the next several posts. After which, the most recent post will be of shots of what I'm doing right now.
I have got to say, last term was fun. This term is even more enjoyable. I'm only taking 2 classes at Gnomon this term, Digital Sets and Env. Creation for Games and it's so much fun. I wanted to really focus on these two classes to hopefully produce some quality work that can be refined into a portfolio reel piece. Will have to see how it goes.
Anyway, now to catch up with stuff. This is from last terms Environment Design class and was the submission for my midterm - a black and white value study of an environment.
I found this to be a unique experience overall. As I don't come from a traditional art background, painting isn't really a strength. Even if it is digital in Photoshop. But as I went through the class I learned a lot of stuff and frankly, I felt that I improved from this class. The master copies we had to do were a new experience and I botched up the first batch, but quickly got into the flow of things during the second and following batches.
For this midterm, thanks to a wonderful critique from Aaron Limonick, my teacher, I was able to really improve it and come to a proper understanding of how these are made. A big thanks to him! Anyway, moving on to the next post!
Subscribe to:
Comments (Atom)


